When we use a wooden house for a long time, the shingles on the roof will be damaged due to wind and sun exposure. At this time, we need to understand how to replace and install new shingles. Next, I will explain how to cut wood shingles in 6 steps.
Understanding the Basics of Wood Shingle Cutting
Before cutting wood shingles, there are some necessary basics to understand so that we can complete the entire operation safely and quickly.
Shingle Types
There are many types of shingles sold on the market, such as asphalt shingles, cedar shingles, etc. Different types of shingles require different saw blades. For example, asphalt shingles only need to be cut with ordinary tools, but for harder cedar shingles, a carbide saw blade is required. The smoothness of the cut will also vary depending on the type of saw blade used. This is the most important preparation before cutting wood shingles.
Cutting Direction
The cutting direction determines the smoothness of the shingle. Incorrect cutting methods can not only affect the strength of the shingle but also easily lead to damage and tearing. When cutting asphalt shingles or building shingles, we should cut along the grain of the shingle; if cutting cedar shingles, the cutting direction is the opposite, and we should cut against the grain of the shingle.
Why Ridge Shingles are Important
Ridge shingles are important for maintaining the roof in good condition and avoiding expensive repairs. Regular inspection and maintenance of ridge shingles are crucial for keeping them in good condition.
Step-by-Step Guide to Cutting Shingles
Step 1: Choose the Right Shingles
Choose good quality shingles from the market.
Step 2: Prepare Tools
1. Hand saw or electric circular saw
2. Utility knife
3. Measuring tape
4. Pencil and paper
5. Safety glasses, gloves, and dust mask
Step 3: Measure and Mark the Shingles
Use a measuring tape to mark the length, align and cut the shingles, and trim the edges.
Check for consistency. Then mark the back with a pencil to ensure accurate cutting.
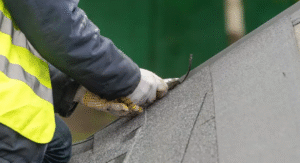
Step 4: Install Ridge Shingles
1. Draw a curve on the shingle with a pencil or chalk.
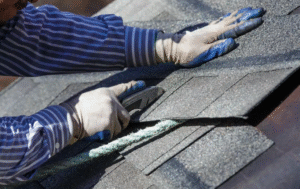
2. Next, use a hand saw or electric circular saw to cut slowly and carefully along the marked line. 3. First, make a small cut just outside the marked line, then use a utility knife to trim it to the curved shape.
4. After the tiles are cut, clean up the sawdust and debris.
Steps for Cutting Curved Tiles
Safety First
Start by cutting from the ridge cap
Then perform vertical cuts
Add horizontal cuts
Use a straight edge tool
Install the new tiles
Finally, dispose of the waste properly
Roof Maintenance After Installation
Regularly check for damage
The best time to inspect roof tiles is in spring and autumn. Regularly checking the roof helps identify damage and wear caused by weather. If any damage is found, take necessary repair measures as soon as possible.
Clean debris from gutters and downspouts
After installing the roof, it's also important to clean debris from the gutters and downspouts. Leaves, branches, and dirt buildup can clog the gutters, preventing proper drainage and causing rainwater to back up onto the roof.
If not dealt with promptly, this can lead to leaks. Therefore, it's best to clean these areas twice a year, in spring and autumn, and more frequently if necessary.
Replace damaged or missing tiles
Damaged or missing tiles should be replaced as soon as possible to prevent leaks and subsequent, more serious problems. To be prepared, be sure to use tiles that match your existing roof tiles to ensure a good seal. This helps prevent future problems.
Conclusion
Now you have a basic understanding of tile cutting knowledge and tools. We are a manufacturer of cutting tools and can help you successfully start your DIY roofing project. Our team of experts is dedicated to helping homeowners give their roofs a fresh look without spending a fortune. So, don't hesitate, let us help you choose the right cutting tools to ensure your home is protected from rain, snow, wind, and other harsh weather conditions. Please contact our team of cutting tool professionals.